CMS Joomla on Open Server Panel 6: Installation Guide

What is Open Server Panel 6?
Open Server Panel 6 is a powerful and multifunctional tool for local web development on the Windows operating system. It allows you to create full-fledged server environments on your local computer, significantly simplifying the process of developing, testing, and debugging web projects.
Among the main components of Open Server Panel 6 are support for various versions of PHP, MySQL, Apache, Nginx, and many other technologies used for creating modern web applications. Thanks to its user-friendly interface and ease of configuration, this tool has become indispensable for many developers working with CMS Joomla and other popular content management systems.
System Requirements for OS Panel 6
- Operating Systems: Windows 10 v1607 / Windows Server 2016 or newer;
- Hardware Resources: At least 3 GB RAM and 10 GB of free disk space;
- System Software: MSVC++ 2005-2022 Redistributable Packages (included in the package);
- File System: NTFS
You can download OS Panel 6 for free from the official website.
Note 32-bit systems are not supported. Additionally, other operating systems, including Linux and macOS, are not supported.
Installation of OS Panel 6
After downloading the installation file to your computer, you can proceed with the installation.
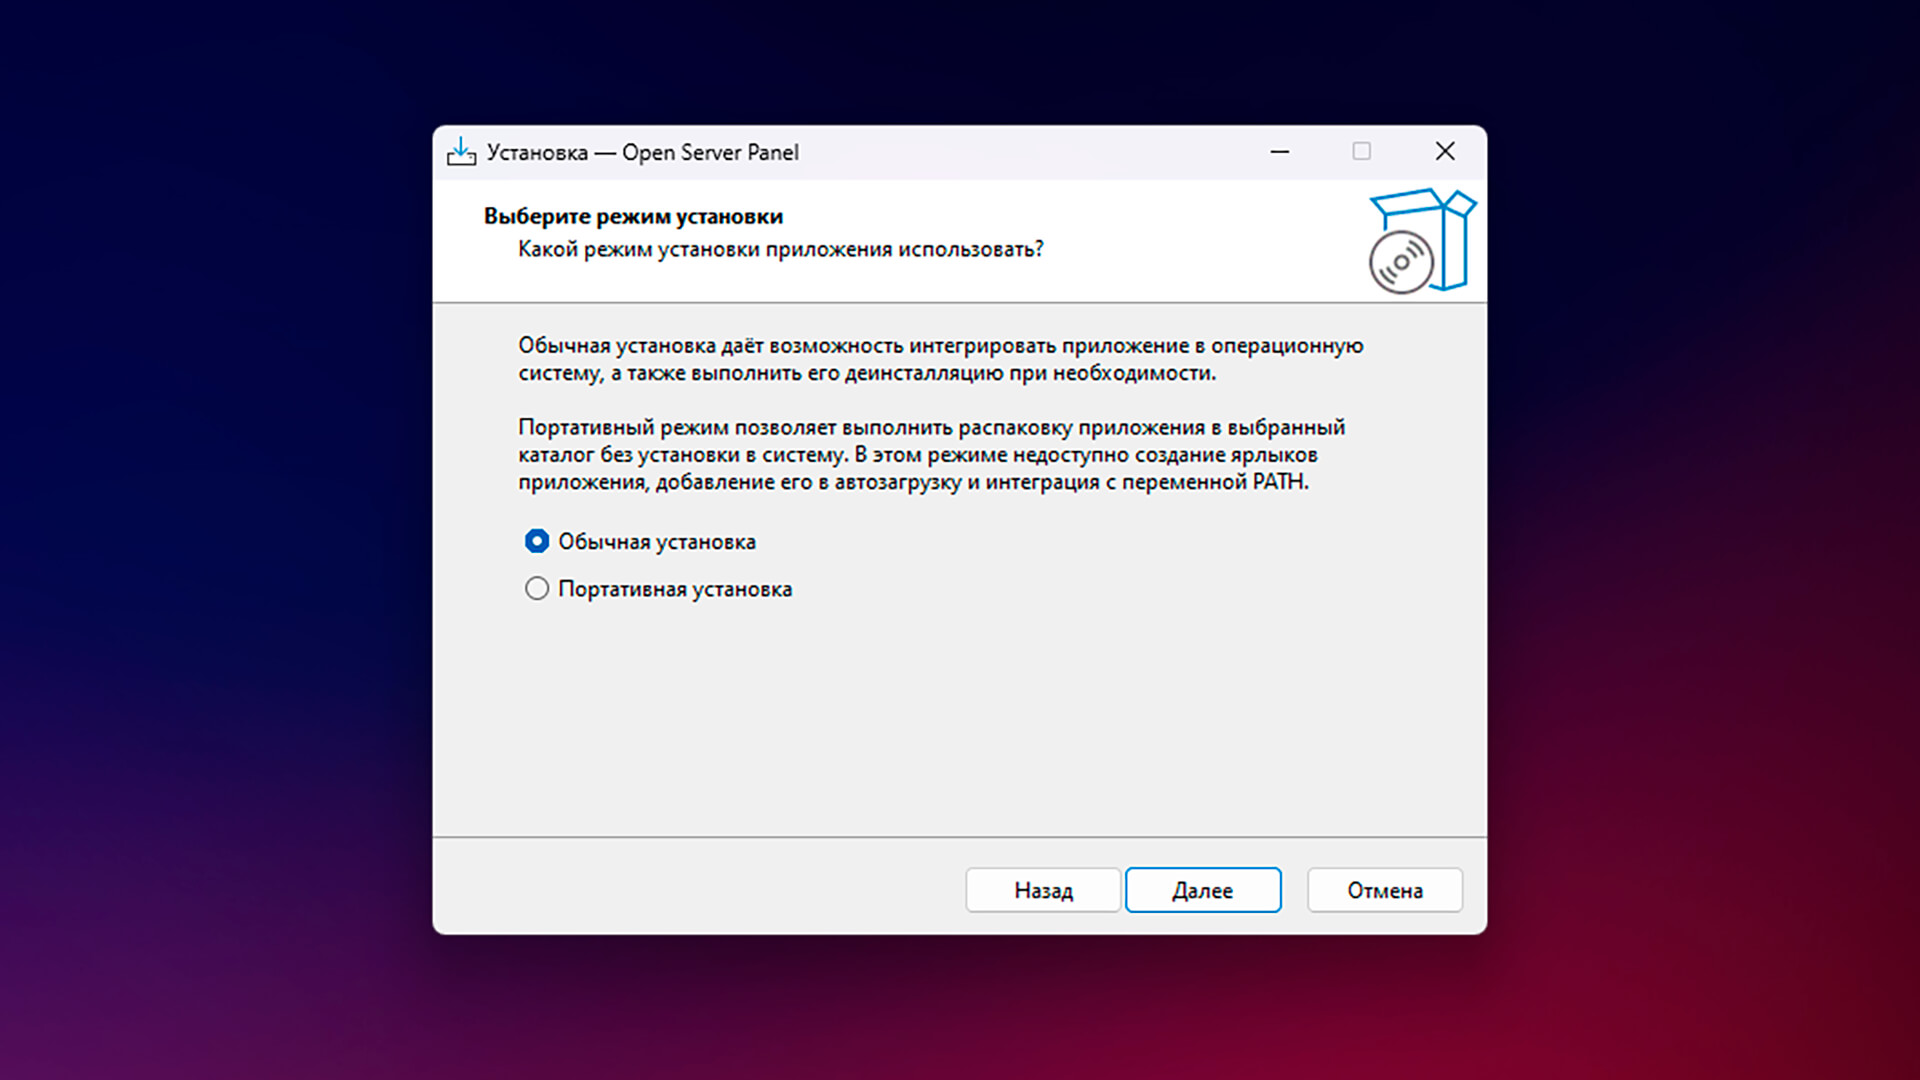
To do this, simply run the executable file open_server_panel_6_x_x_setup.exe and follow the installation wizard instructions, selecting your desired installation option. During the installation, you can also choose only the necessary modules, such as PHP, MySQL, MariaDB, Nginx, PostgreSQL, Redis, etc., to save disk space.
Note In this manual, we will consider an example of installing the Joomla CMS using PHP-8.2 and MySQL-8.2. You can choose any other versions of the modules, but if you want to do everything exactly as described in this guide, be sure to install these versions of the modules.
Starting and configuring OS Panel 6
After you have installed the programme with all the modules you need and restarted your computer, you can launch the Open Server Panel shortcut that appears on the Windows desktop.
For the first launch, we need to make some settings:
- In the lower right corner of the window (where the Windows clock is located), you can see a panel icon on which you need to right-click (hereafter I will write «RMB»).
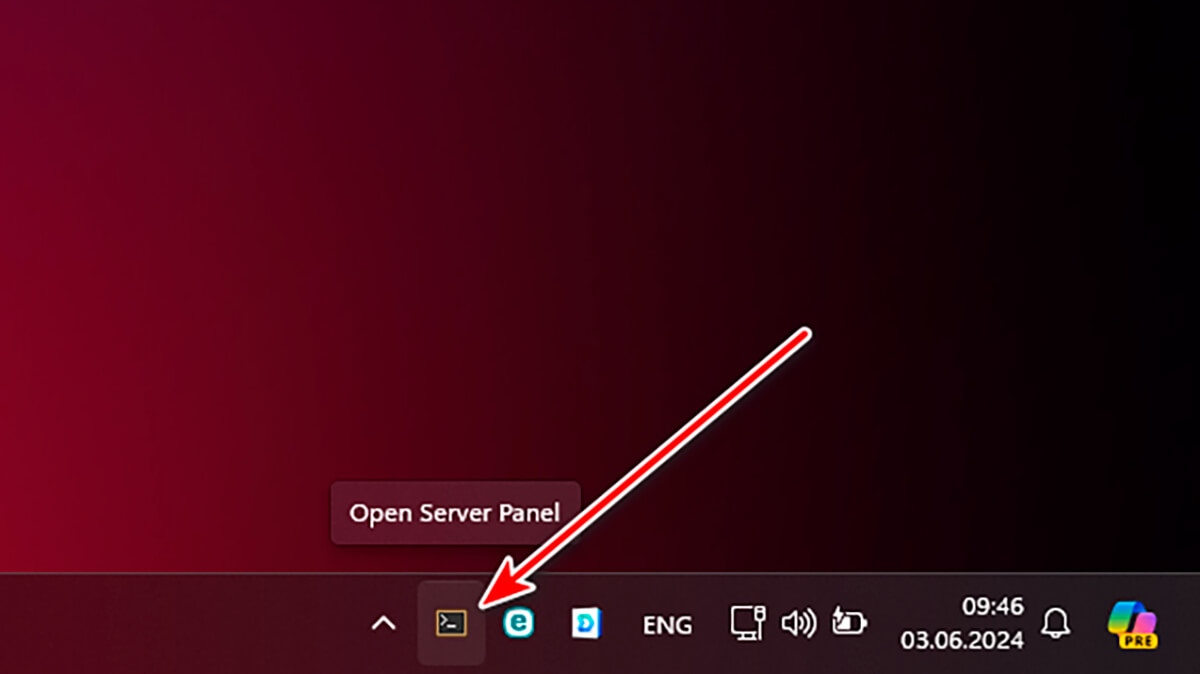
Note if you do not see the OS Panel, then click on the «up» arrow on the Windows taskbar and you will see all the running applications.
- Enable MySQL. To do this, select
Modules,MySQL-8.2,Enable. - We do the same for PHP —
RMB,PHP-8.2,Enable. - Now we can check that Open Server Panel 6 is working properly. By default, we already have 3 projects created:
- example.local
- forum.full-example.local
- full-example.local
Let's run one of them to make sure that everything works. To do this, we again right-click on the OS Panel 6 icon and select PHP-8.2 for the example.local project.
Open the test project example.local in a browser in any convenient way:
- click the RMB on the panel icon, hover over
example.localand selectOpen in Browser; - or enter
https://example.localin the address bar of your browser and press the Enter key on your keyboard.
If you have done everything correctly, you will see the following on the screen:
Note If you do not see this page, try restarting the panel by clicking the right mouse button on the icon and selecting Restart.
Creating your project
In order to create your project in Open Server Panel 6 and place a Joomla site in it, you need to do the following:
- Go to the folder OSPanel. If you haven't changed the installation path, it defaults to
C:/OSPanel. Next, go to the home folder and create a directory with the name of your project, for example joomla.local. - We go to our new project folder joomla.local, and create 2 more folders in it, namely .osp (note that there is a dot in this name!) and the public folder (looking ahead, it is the folder where we will copy the Joomla CMS in the future).
- Open the .osp folder and create the project.ini file in it (project is the name of the file, and .ini is its extension). You can do this with any program that can create and edit plain text files. Even the standard Notepad on Windows will do, but you can also use other free popular code editors such as Notepad++ or VSCode. Open the project.ini file and add this code to it:
Save and close the file.[joomla.local] public_dir = {base_dir}/public php_engine = PHP-8.2 nginx_engine = - Click the RMB in the Open Server Panel and select Restart. The panel will restart in a few seconds. Now, if we click RMB on the OS Panel 6 icon again, we can see our newly created joomla.local site in the list of projects.
Installing phpMyAdmin
Unlike Open Server Panel 5, version 6 of the panel does not have such a necessary component as phpMyAdmin by default. However, this is not a problem because it is easy to install.
How to install phpMyAdmin in Open Server Panel 6?
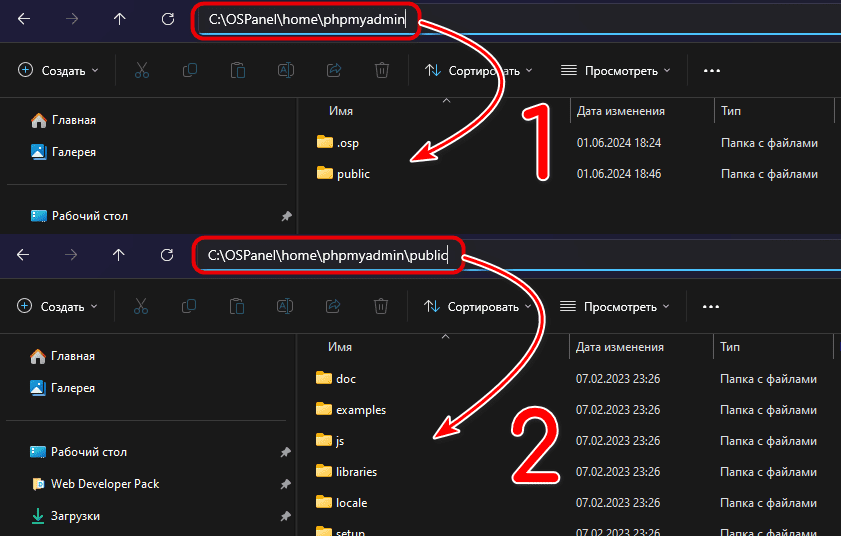
1. First of all, we need to create a project for phpMyAdmin in the same way as we did for joomla.local. To do this as quickly as possible, I recommend creating a phpmyadmin folder at C:\OSPanel\home\ and simply copying all the content from the joomla.local folder into it. Go to the phpmyadmin folder, then to the .osp folder, open the project.ini file and change the line [joomla.local] to [phpmyadmin] and save the file.
2. Go to the official phpMyAdmin website and download the current version of the programme to your computer by clicking on the «Download» button. Unzip the downloaded .zip file (wherever you want). As a result, you will have a folder, for example, with the following name phpMyAdmin-5.2.1-all-languages (the version may differ, it doesn't matter). Now you need to copy the entire contents of this folder to the C:\OSPanel\home\phpmyadmin\public.
So you should end up with the following:
3. In the C:\OSPanel\home\phpmyadmin\public folder, find the config.sample.inc.php file and rename it to config.inc.php. Open it for editing with any program such as Notepad++, VScode, or the usual Windows «Notepad».
Now we need to make some adjustments to file config.inc.php:
3.1 In line 16 we find the following code
$cfg['blowfish_secret'] = '';and replace it with
$cfg['blowfish_secret'] = '7040DF61B648E6F8CEBE4CAE84F9D7FD';3.2 In line 30, the code
$cfg['Servers'][$i]['host'] = 'localhost';change to
$cfg['Servers'][$i]['host'] = 'MySQL-8.2';3.3 Now let's allow ourselves to enter phpMyAdmin without a password. To do this, you need the following code in line 32
$cfg['Servers'][$i]['AllowNoPassword'] = false;change to
$cfg['Servers'][$i]['AllowNoPassword'] = true;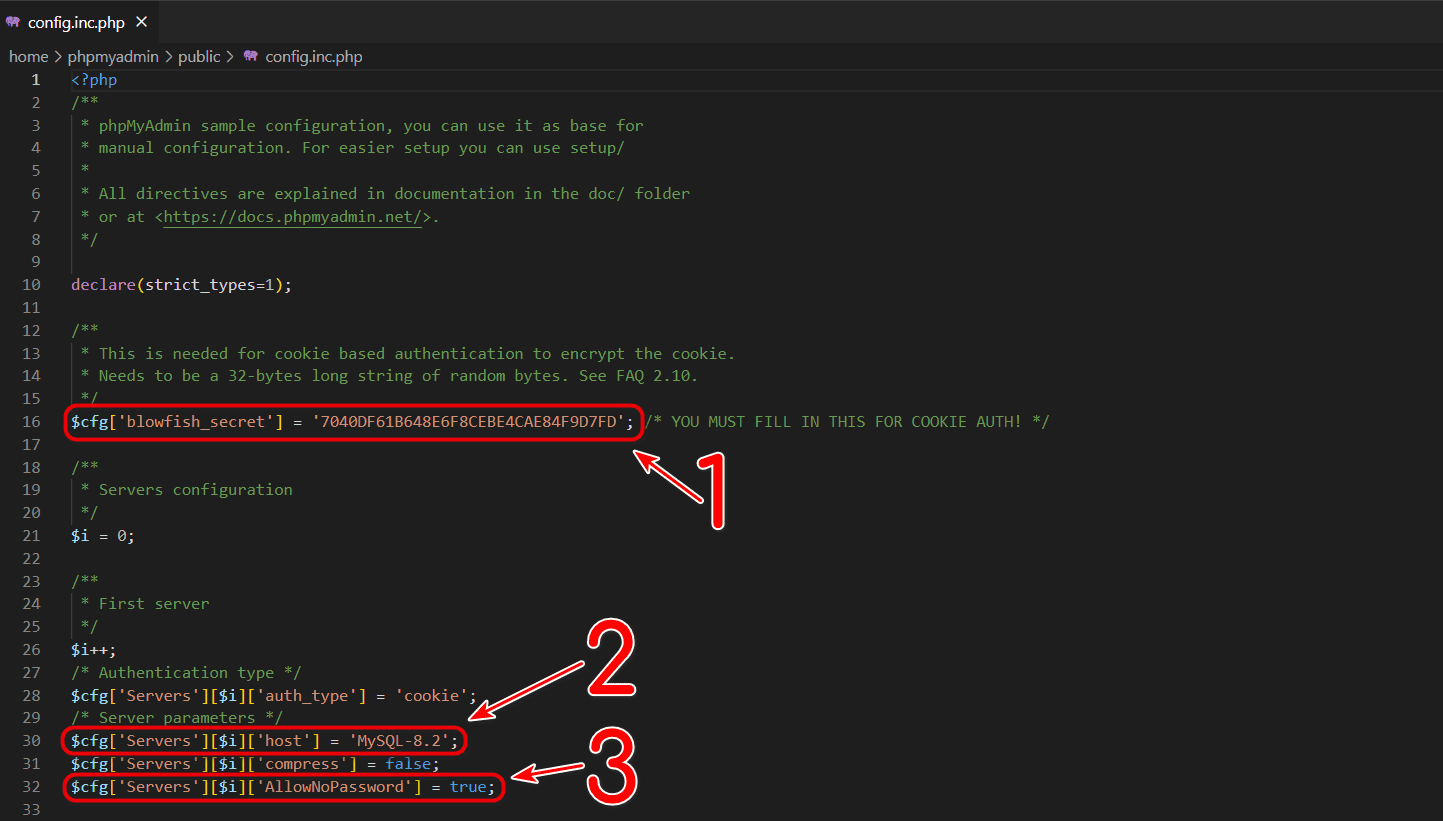
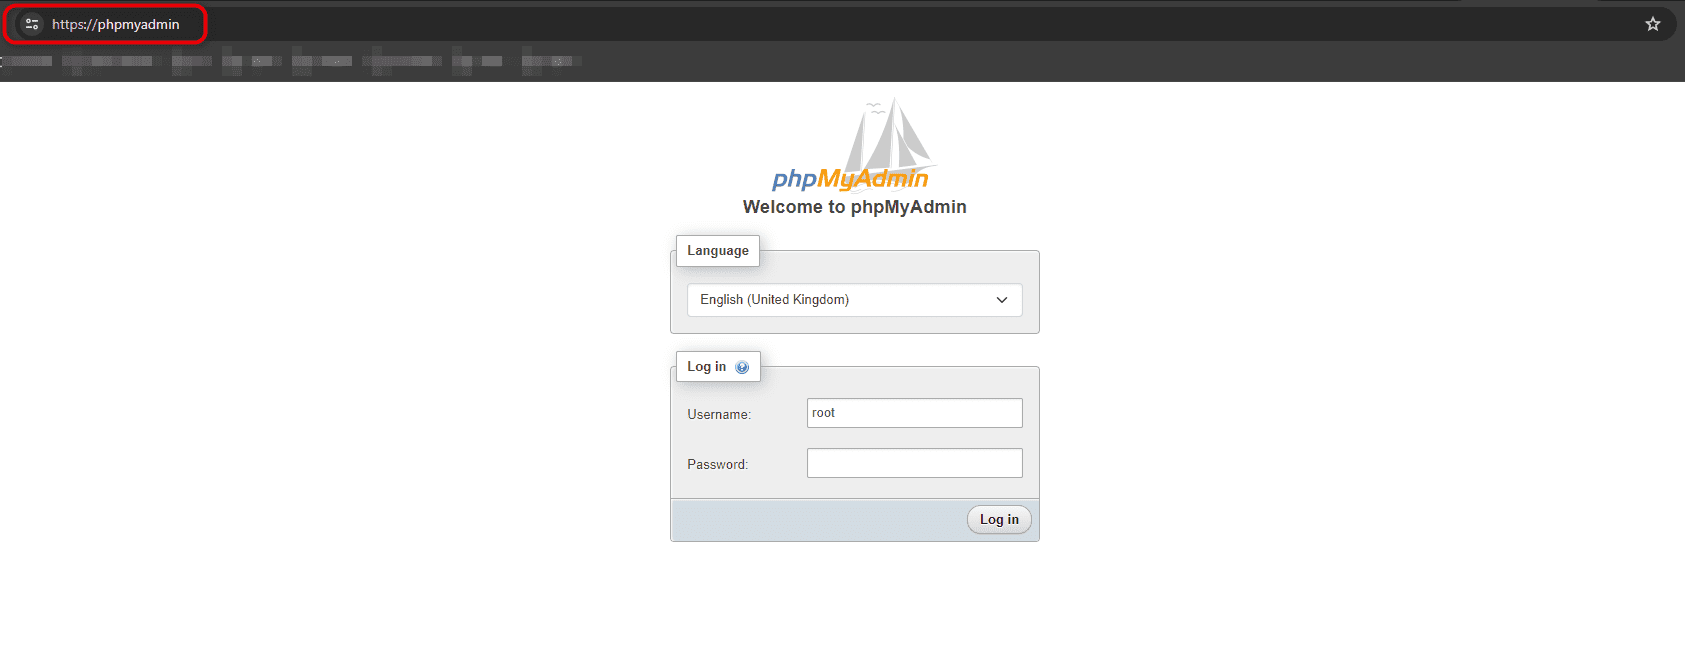
That's it, save the file. Reboot OS Panel 6 and log into our project with phpmyadmin (RMB on the icon, select phpmyadmin). The administrator login opens, where we have to enter the root login, and there is no need to enter a password. Click the Log in.
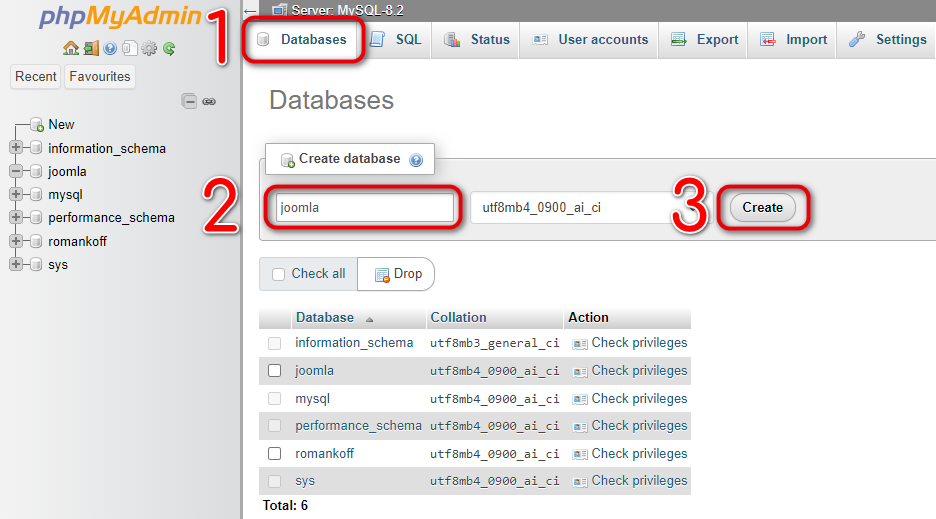
Since we have already come here, let's create a database in advance for the future site on CMS Joomla, which we will install in the next step. To create a database, click the first tab «Databases», enter a name in the «Database name» field, for example, joomla, and click the «Create» button.
Installing CMS Joomla
Let's summarise what we have done so far:
- installed Open Server Panel 6 with all the necessary modules for work;
- created the joomla.local project, which is «waiting» for the installation of the Joomla CMS;
- created the phpmyadmin project, where we installed the phpMyAdmin downloaded from the official website, and using it, created a database called joomla.
Finally, the final step is to install the Joomla CMS on Open Server Panel 6.
1. Download the archive with the current version from the official website of CMS Joomla.

2. We unzip the entire contents of the .zip archive into the folder C:\OSPanel\home\joomla.local\public
3. Now select the joomla.local project by pressing the right-click button on Open Server Panel 6 (or you can simply type in the link https://joomla.local and press the Enter key if you prefer) and the Joomla installation will begin.
4. During the installation process, you will be asked to fill in the required fields at each step. This includes entering information about your site, creating administrator credentials, and setting up a database connection. Follow the instructions carefully at each stage to ensure that your future website works correctly. Thanks to the intuitive Joomla installation wizard, this process will be easy and straightforward even for beginners.
| Field name | Explanation |
|---|---|
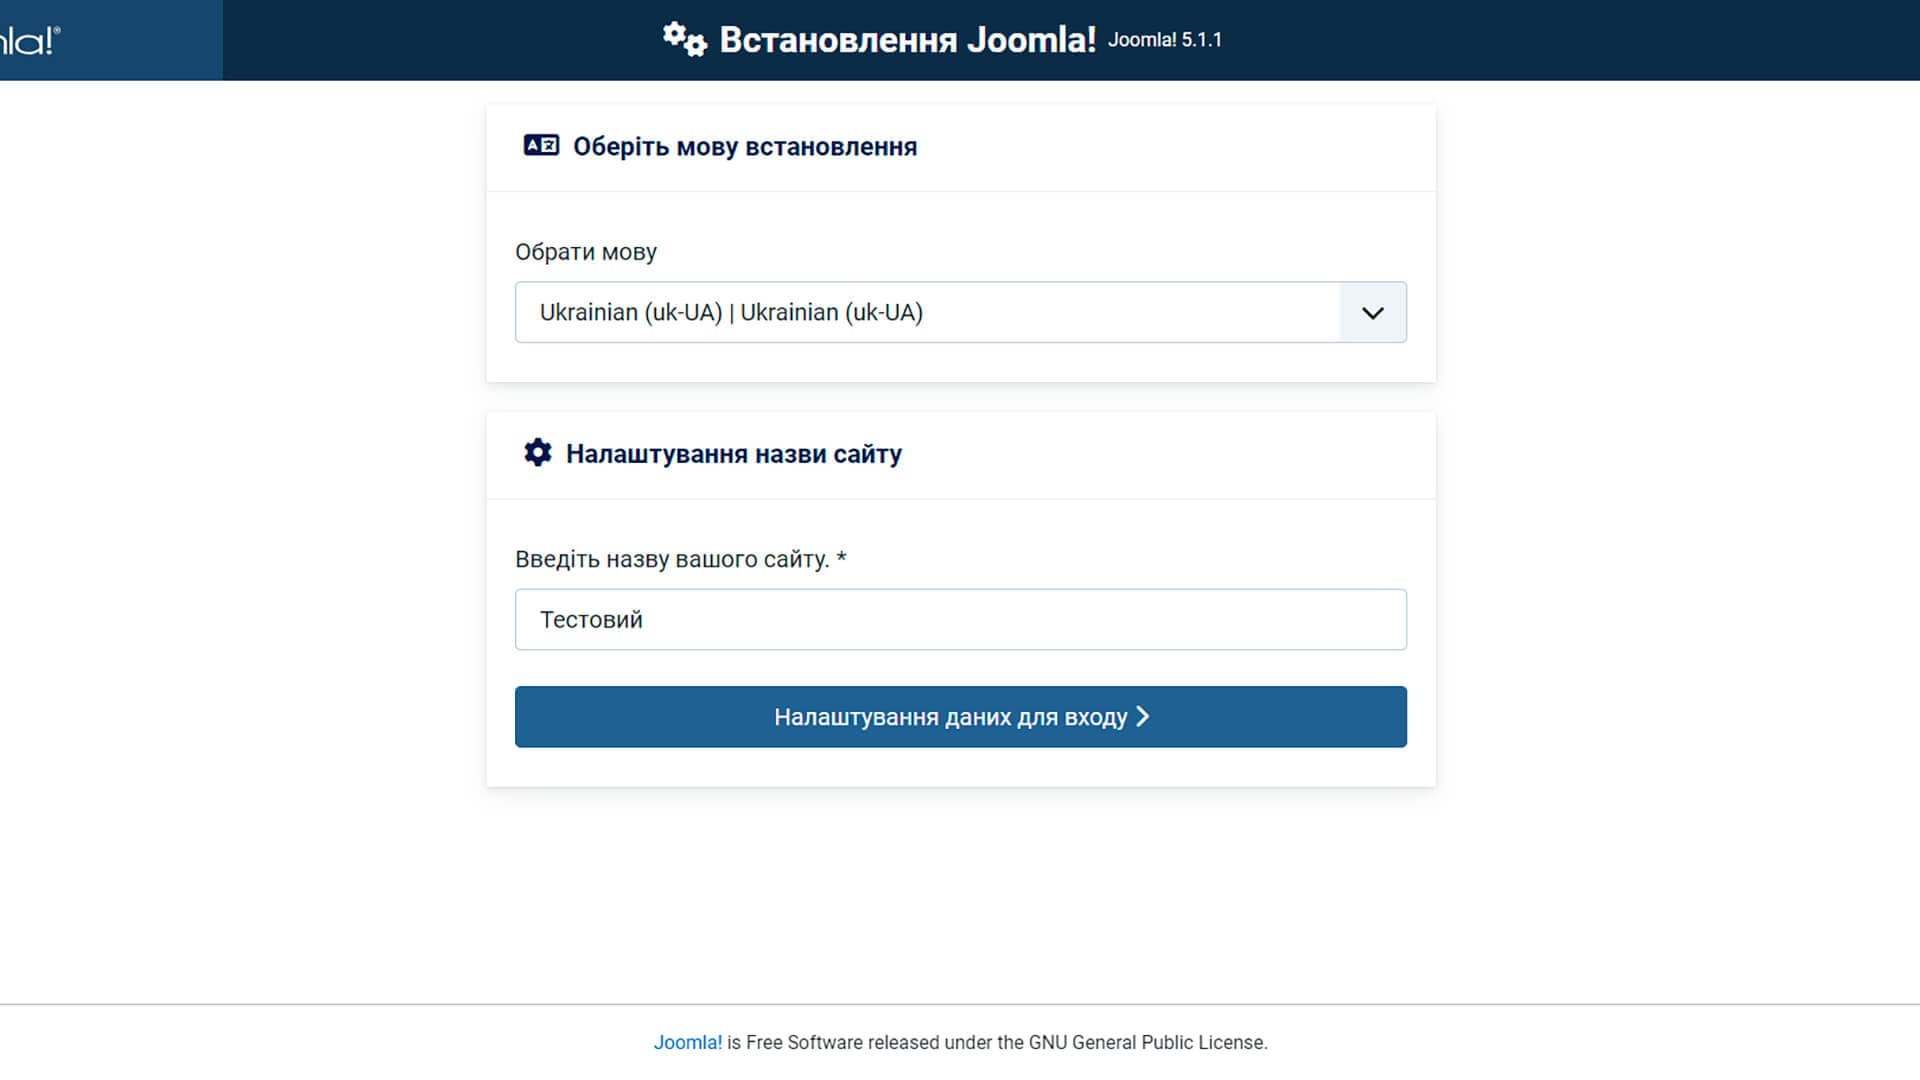
| Select language | Here you can choose any language you like. |
| Site name | Enter the name of the future website. |
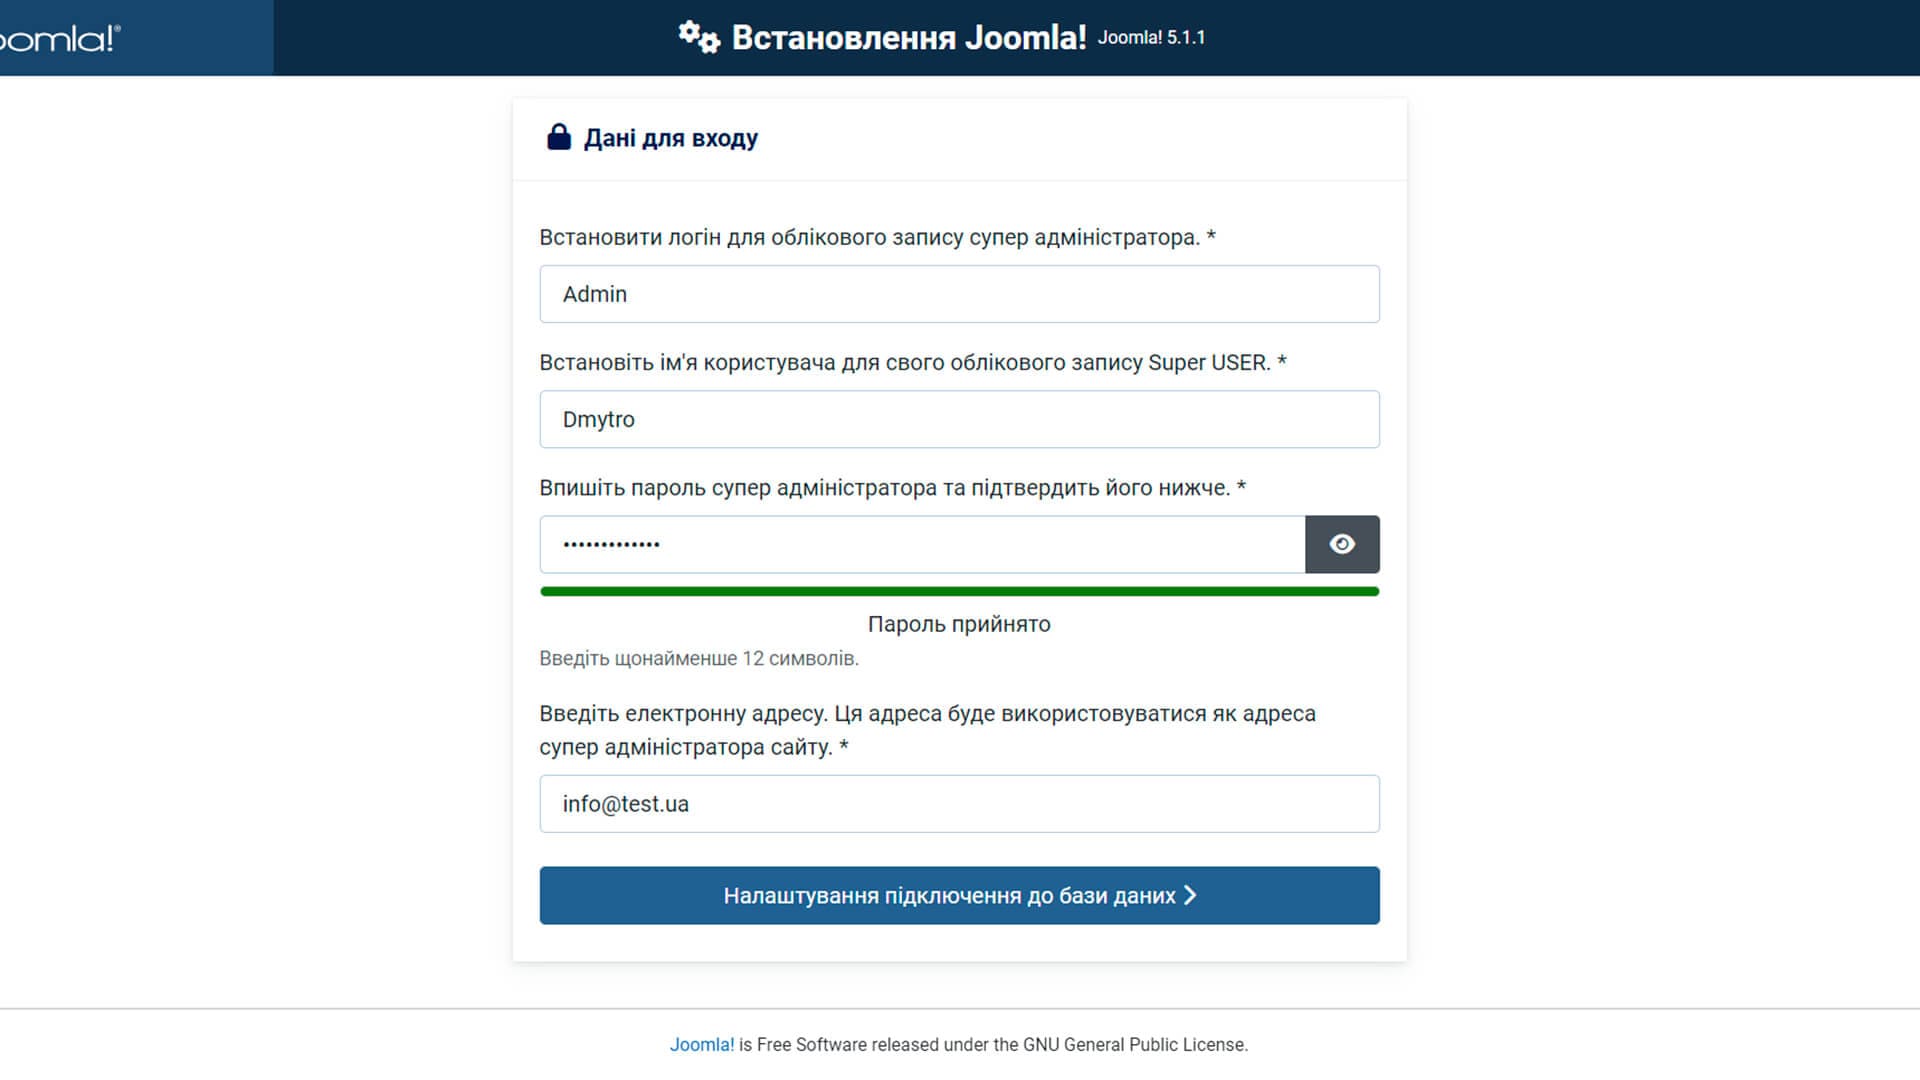
| Login | Your login to the system to enter the administrative panel. |
| Password | Password to access the administrative panel. |
| Email. | Your email address for your administrative account. |
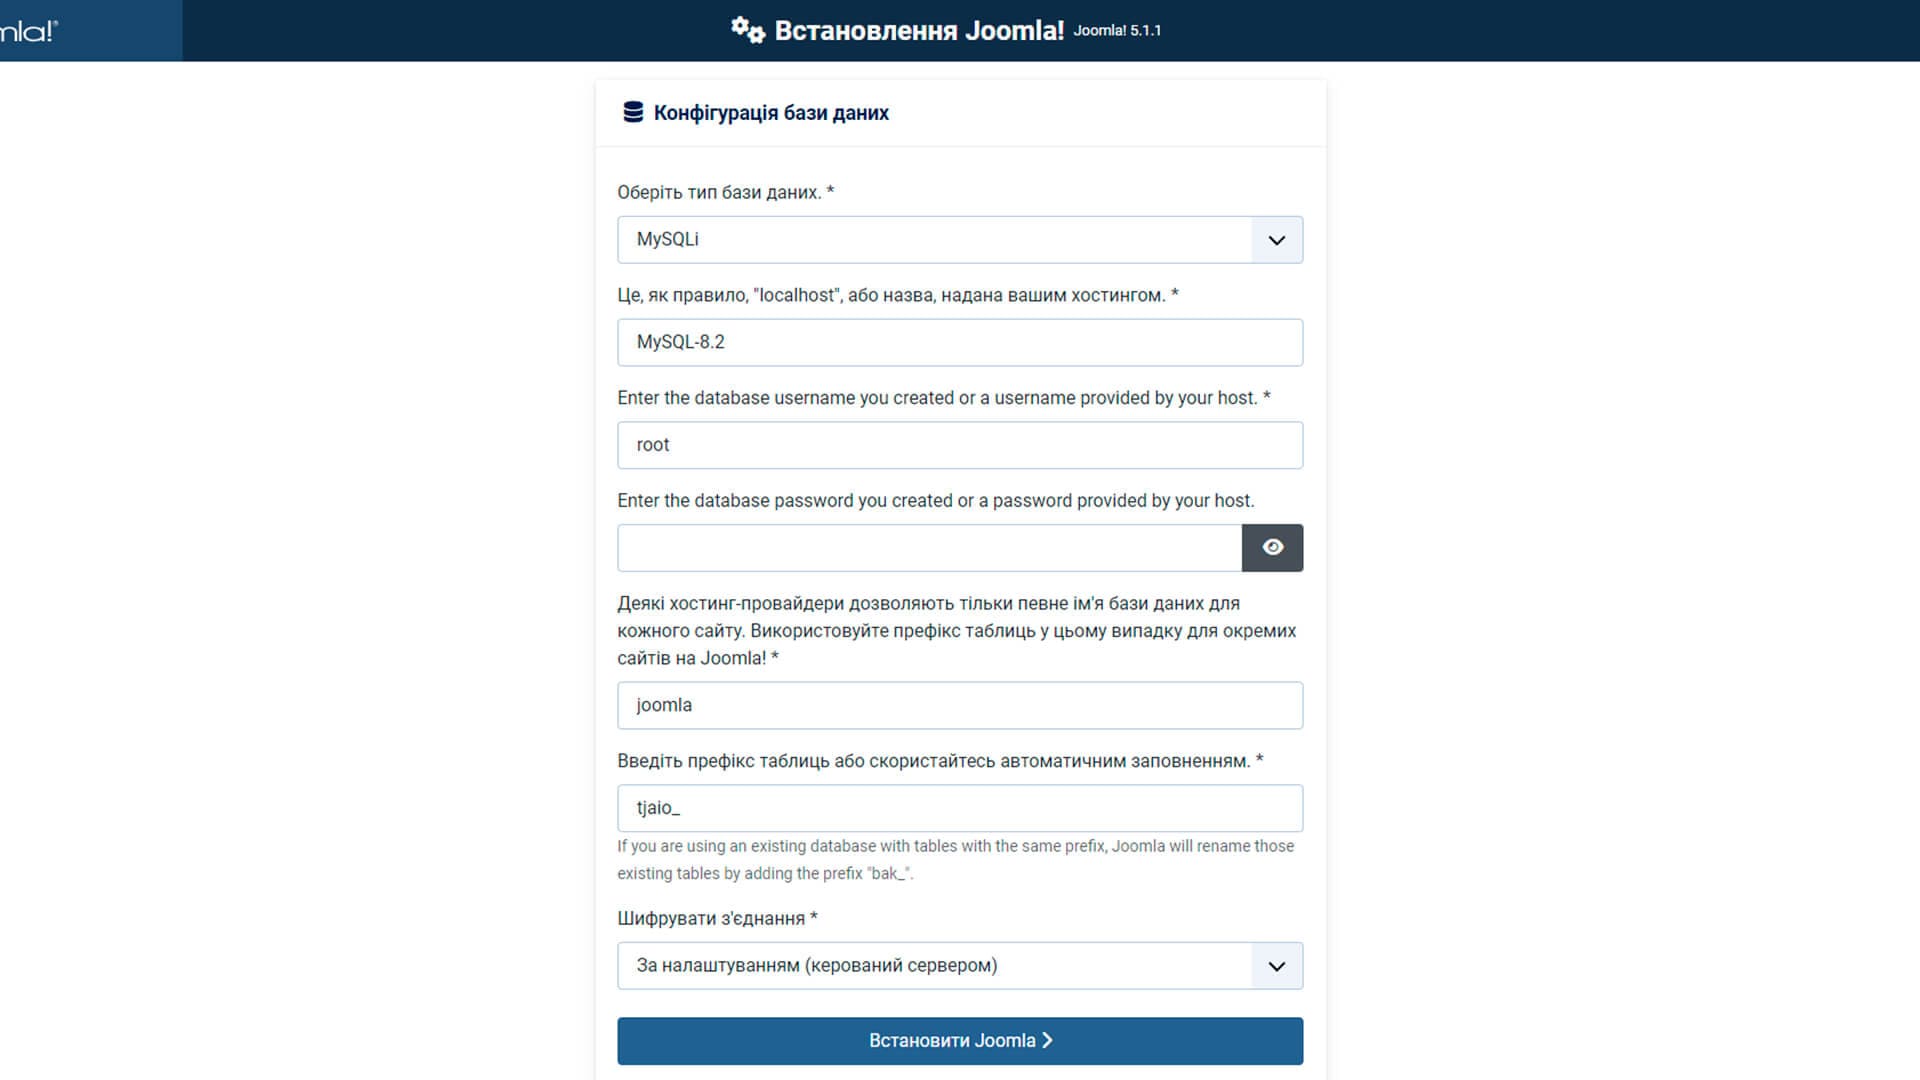
| Database type | Choose the type of database you are using. |
| Database server | Enter the address of the database server, in our case it is MySQL-8.2 |
| Database user name | Enter the database username, in our case it is root |
| Database name | Enter the name of the database you created, i.e. joomla |
| Table prefix | Prefix for database tables, used to avoid conflicts. You can leave it unchanged. |
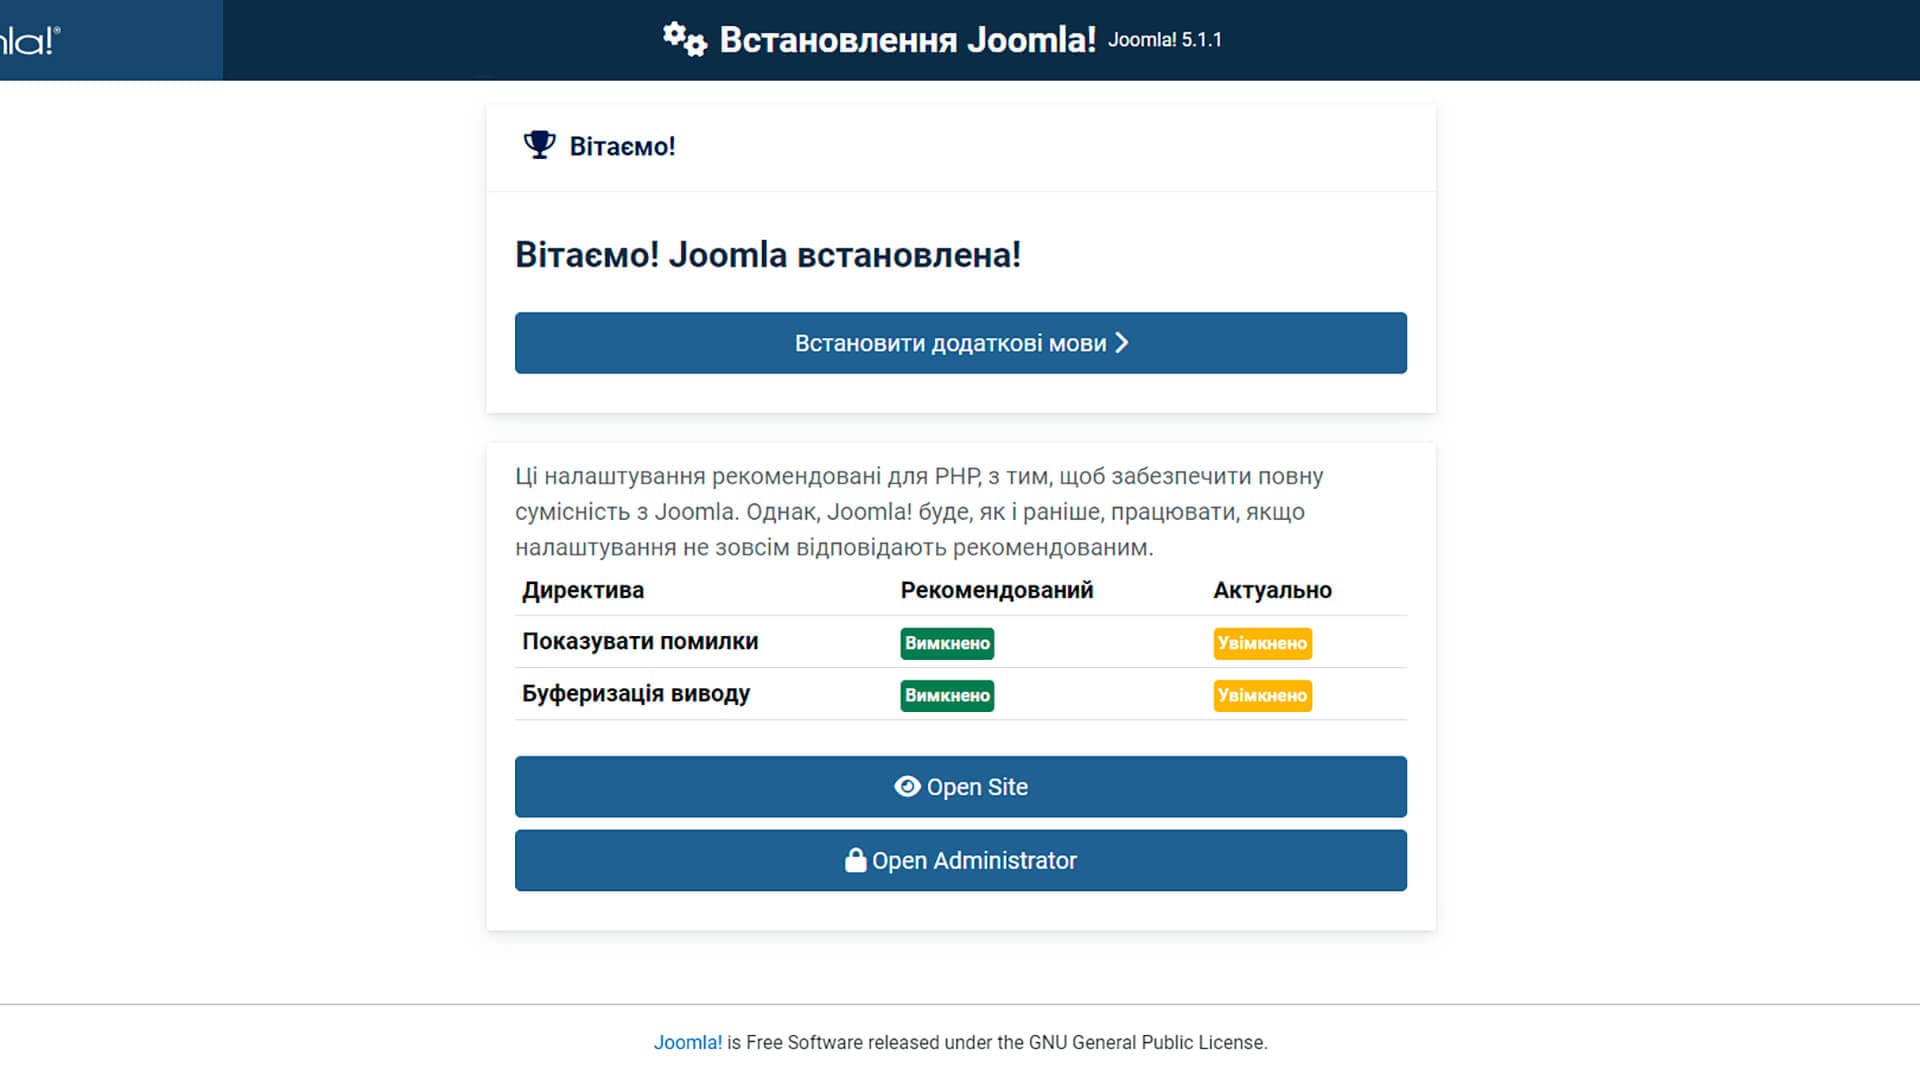
To make the Joomla installation process even more visual, below you will find screenshots of each installation step.
Conclusion
Using Joomla on a local server with Open Server Panel 6 provides numerous advantages for web developers. Firstly, it allows you to quickly and conveniently test and debug sites without the need for an Internet connection. Open Server Panel provides support for various versions of PHP, MySQL, MariaDB, Nginx and other necessary technologies, which allows you to create the perfect development environment. In addition, the ability to select only the necessary modules helps to save disk space. This approach not only speeds up the development process but also ensures high performance and security of projects, which is especially important for professional developers.
Comments: 0
Only logged in users can comment